Controlling who can access the SPRCHRGR Verify App and participate in your approval workflows is essential for maintaining security and ensuring the right people are involved in decision-making. As an administrator, you have the ability to grant or revoke approval access for team members, allowing you to build a customized approval team that matches your organization's structure and authorization requirements.
The Members management interface provides a centralized view of your entire team's approval access status at a glance. From here, you can onboard new team members and grant them access to the Verify App, or modify existing users' settings to adjust their roles and notification preferences. When configuring approval access for a team member, you'll enable their access, assign their authorization role (which determines their approval capabilities), and set up their default notification preferences to control when they receive email alerts. While administrators set the initial notification settings during setup, individual team members can later personalize their own notification preferences from the Approval List page to suit their workflow. This flexibility ensures everyone stays informed without being overwhelmed by unnecessary alerts, creating an efficient approval process that keeps your business moving forward.
Prerequisite
-
You must be an administrator with the Ability to add and edit a users in your company to be able to manage individual team members access to the Verify App.
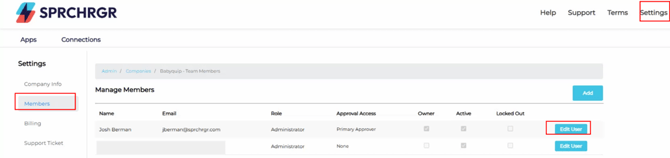
- Log into the sprchrgr.app portal as an administrator.
- To assign access to the Verify App, navigate to Settings > Members
- The Approval Access column gives quick glance into the access currently assigned to all onboarded team members.

- Click the Add button to begin onboarding and assigning access to a new team member.
- Click the Edit User button to modify access for existing team members.
- You'll be redirected to an edit user screen. Scroll down and toggle the Enable Approval Access checkbox to turn access on or off. Using the dropdown, select if you want to make them a primary or delegate approver, as well as the notification settings for this team member. Refer to the articles on Understanding Approver Authorization Roles and Understanding Notification Settings for more details.

- Note that at least one primary approver MUST have Notify on New Requests turned on. Individual team members that are not system administrator will still be able to modify their notifications settings in the main Approval List page which they will have access to as long as they are assigned an authorization role.

- Click Save when you are satisfied with the settings.
Questions? Contact Us