
1. Choose or create a private channel
Already have a private channel you want to use? Open it and continue to step 2.
To create a new channel, select Add channels and choose the option to create a channel. Enter a name, such as sprchrgr-team, and click Next. Select Private - only specific people, then click Create.
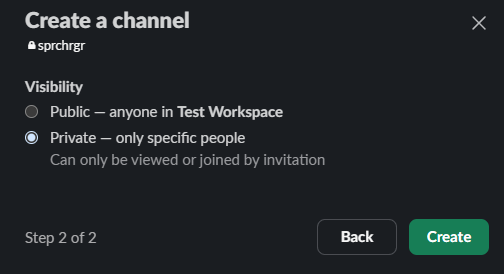
Select Private - only specific people before creating the channel.
2. Invite your SPRCHRGR accounting inbox
In the channel, select Add people to channel. If you just created the channel, the invitation dialog opens as part of that process.
Enter your assigned SPRCHRGR accounting email address, select the Invite result, and click Add.
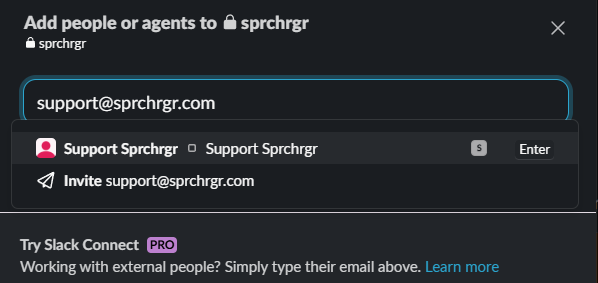
Enter your assigned SPRCHRGR accounting inbox. The address shown here is for the demo only.
On the next screen, select An external organization, then click Next. This sends a Slack Connect invitation to the channel. Do not select Your organization.
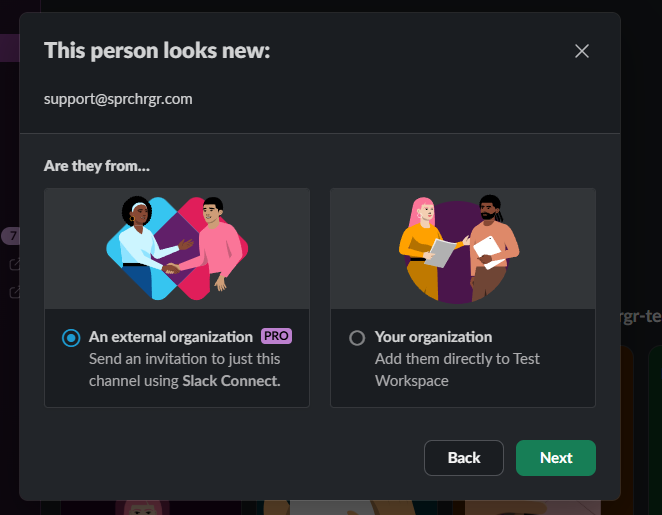
Choose An external organization, then click Next.
3. Allow SPRCHRGR to post and invite
On the Channel permissions screen, select Post and invite, rather than Only post, then click Next.
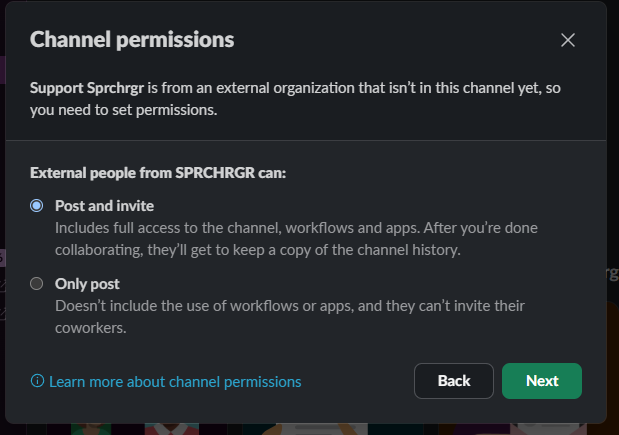
Select Post and invite, then click Next.
Review the destination email address, add an optional note, and click Send Invitation. Click Done on the confirmation screen.
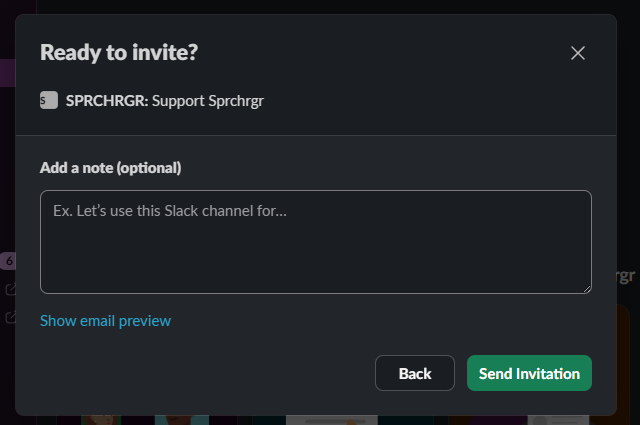
Review the invitation and select Send Invitation.
5. Wait for setup confirmation
The SPRCHRGR team will accept the invitation, add the SPRCHRGR bot, and complete the setup. We will let you know when the channel is ready.
A welcome message alone does not mean setup is complete. If the bot says the channel is not fully set up, wait for our confirmation before relying on Slack for requests.
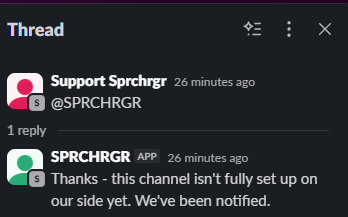
A setup-in-progress message is not a ticket confirmation.
6. Send a message or start a separate request
Once we confirm your channel is ready, you can message our team there as you normally would in Slack. You don’t need to tag anyone for your message to reach us.
For a specific task you’d like us to track separately, post a new message in the channel, mention @SPRCHRGR, and explain what you need.
Example request
@SPRCHRGR, can you please review the August bank reconciliation and let us know if anything is still outstanding?
The bot will post a confirmation with a ticket number. This means a separate ticket has been created for your request, and you can reference that number when following up.
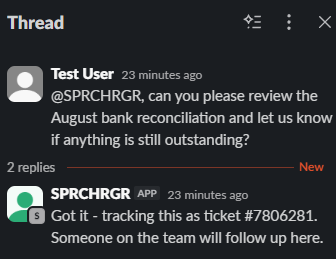
The demo acknowledgment includes ticket #7806281.
7. Keep follow-ups with the right request
For a request with a ticket number, open the thread associated with the bot’s confirmation and use the Reply box to add details, ask questions, or share updates. This keeps your follow-ups connected to that specific request.
Our responses appear in the request’s thread and in the main channel, so you’ll see our answer even when you’re not following the thread.
You can still use the main channel for general conversation. Those messages reach our team too; using the request’s thread simply keeps everything about that task together.
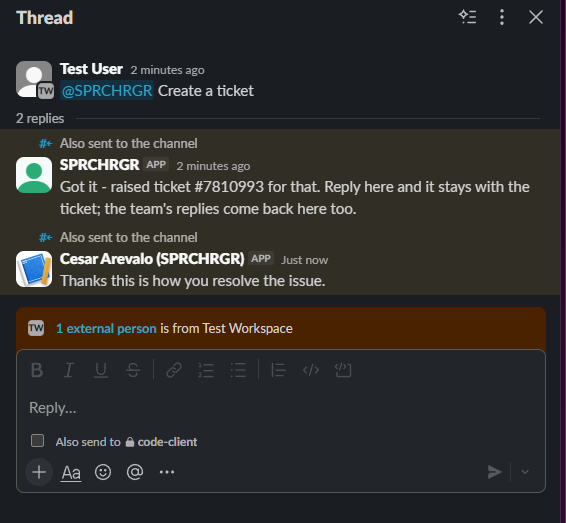
The request, ticket number, team response, and Reply box stay together in one thread.
What to remember
New request: Post a new channel message and mention @SPRCHRGR again to start a separate ticket.
Normal conversation: Untagged channel messages are not captured as new requests. Mention the bot when an action item needs tracking. Replies in an existing ticket thread stay with that request.
Our response standard on Slack is the same as email, which is same day or the following morning. If something is genuinely time sensitive, email or a call will always be faster.